


BLOG
【WordPress】ページごとにカスタムCSS&JavaScriptを自作する方法
【WordPress】ページごとにカスタムCSSとJSを自作する方法
WordPressサイトにおいて、後から装飾やアニメーションを加えたい時には、子テーマを用意しCSSファイルやJSファイルを編集して反映させることが多いです。
しかし、ある特定の1ページだけにCSSやJavaScriptを反映させたい場合に、わざわざ子テーマを準備するのは手間です。
そんな時に使える方法が、ページごとにCSSやJavaScriptを追記できる「カスタムCSS」「カスタムJavaScript」機能です。
- 特定の投稿や固定ページにCSSやJavaScriptを反映させたい
- プラグインなしでカスタムCSS、カスタムJavaScript機能を搭載したい
このような方に向けて、この記事では「プラグインなしでカスタムCSS、カスタムJavaScript機能を自作する方法」について解説します。
カスタムCSS、カスタムJavaScriptの完成イメージ
先に完成イメージをお見せします。
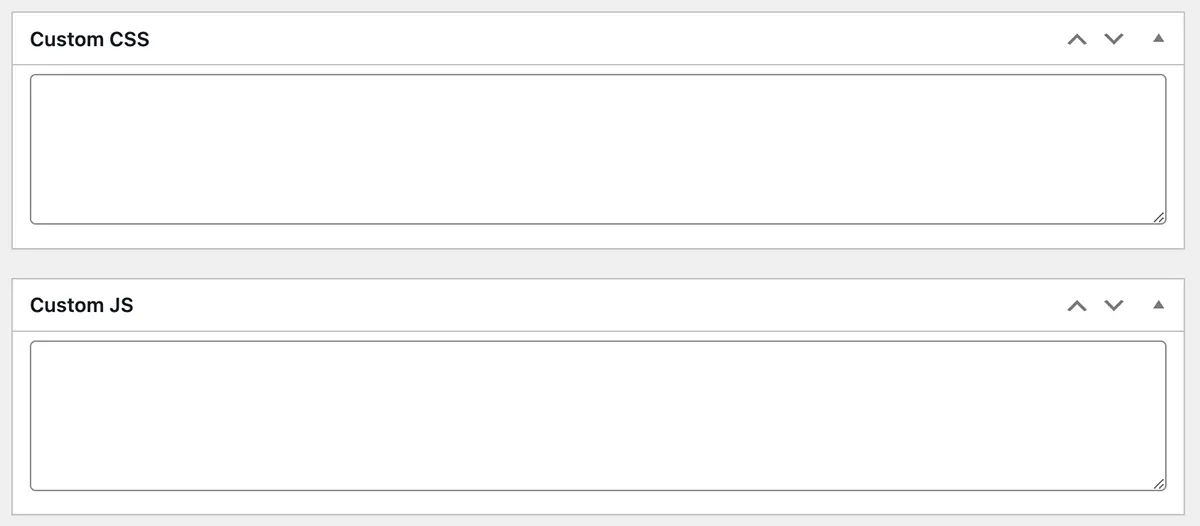
このような入力欄を各投稿や各固定ページの編集画面に表示させ、記述したコードがそのページのCSS、JavaScriptのコードとして追記される仕様です。
カスタムCSSを自作する方法
まずはじめに、完成したコードをまとめて書いておきます。コピペしてfunctions.phpに貼り付ければそのまま使えます。
// functions.phpに以下を記述

// カスタムCSSを追加する投稿タイプを指定して追加
function custom_css_hooks() {
  // カスタムCSSを「投稿」に追加
  add_meta_box('custom_css', 'Custom CSS', 'custom_css_input', 'post', 'normal', 'high');
  // カスタムCSSを「固定ページ」に追加
  add_meta_box('custom_css', 'Custom CSS', 'custom_css_input', 'page', 'normal', 'high');
  // カスタムCSSを「カスタム投稿タイプ "news"」に追加
  add_meta_box('custom_css', 'Custom CSS', 'custom_css_input', 'news', 'normal', 'high');
}

add_action('admin_menu', 'custom_css_hooks');


// 各投稿編集画面にカスタムCSSの入力欄を作成
function custom_css_input() {
  global $post;
  echo '<textarea name="custom_css" rows="5" cols="30" style="width:100%;">'.get_post_meta($post->ID, 'custom_css', true).'</textarea>';
}

// 作成した入力欄に記述があれば、それを保存
function save_custom_css($post_id) {
  if(!empty($_POST['custom_css'])) {
    update_post_meta($post_id, 'custom_css', $_POST['custom_css']);
  } else {
    delete_post_meta($post_id, 'custom_css');
  }
}

add_action('save_post', 'save_custom_css');


// 保存したカスタムCSSの記述を、そのページのwp_head()が呼ばれるタイミングで挿入
function insert_custom_css() {
  if(is_page() || is_single()) {
    if(have_posts()): while(have_posts()): the_post();
      echo '<style type="text/css">'.get_post_meta(get_the_ID(), 'custom_css', true).'</style>';
    endwhile; endif;
    rewind_posts();
  }
}

add_action('wp_head','insert_custom_css');
以下でコードの詳細を3パートに分けて解説します。
カスタムCSS機能を追加
// カスタムCSSを追加する投稿タイプを指定して追加
function custom_css_hooks() {
  // カスタムCSSを「投稿」に追加
  add_meta_box('custom_css', 'Custom CSS', 'custom_css_input', 'post', 'normal', 'high');
  // カスタムCSSを「固定ページ」に追加
  add_meta_box('custom_css', 'Custom CSS', 'custom_css_input', 'page', 'normal', 'high');
  // カスタムCSSを「カスタム投稿タイプ "news"」に追加
  add_meta_box('custom_css', 'Custom CSS', 'custom_css_input', 'news', 'normal', 'high');
}

add_action('admin_menu', 'custom_css_hooks');まずカスタムCSS機能を使えるよう、コードを記述してカスタムCSSの入力欄を設置します。
関数custom_css_hooksの中に、投稿タイプごとにカスタムCSSの入力欄を設置するコードを記載します。
コードの構成は以下の通りです。ラベルや投稿タイプはお好きなようにカスタマイズしてください。
add_meta_box('入力欄divタグのID', '入力欄の上に表示されるラベル', '入力欄を作成する関数', '投稿タイプ名', '編集画面での表示場所', '表示優先度');なお、入力欄を作成する関数 “custom_css_input”は、この後出てきます。
最後にadd_actionでこの関数を有効化します。
カスタムCSSの入力欄を作成
// 各投稿編集画面にカスタムCSSの入力欄を作成
function custom_css_input() {
  global $post;
  echo '<textarea name="custom_css" rows="5" cols="30" style="width:100%;">'.get_post_meta($post->ID, 'custom_css', true).'</textarea>';
}

// 作成した入力欄に記述があれば、それを保存
function save_custom_css($post_id) {
  if(!empty($_POST['custom_css'])) {
    update_post_meta($post_id, 'custom_css', $_POST['custom_css']);
  } else {
    delete_post_meta($post_id, 'custom_css');
  }
}

add_action('save_post', 'save_custom_css');前半部分では、関数custom_css_inputでカスタムCSSの入力欄を作成します。ただのtextareaタグなので、行数などはお好みで調整してください。
後半部分では、作成した入力欄に記述されたコードを保存する関数save_custom_cssを作成しています。
そして先ほど同様、add_actionで投稿記事の編集が保存されたタイミングで、関数save_custom_cssが実行され、記述したカスタムCSSのコードも保存されるようにします。
保存したカスタムCSSを挿入
// 保存したカスタムCSSの記述を、そのページのwp_head()が呼ばれるタイミングで挿入
function insert_custom_css() {
  if(is_page() || is_single()) {
    if(have_posts()): while(have_posts()): the_post();
      echo '<style type="text/css">'.get_post_meta(get_the_ID(), 'custom_css', true).'</style>';
    endwhile; endif;
    rewind_posts();
  }
}

add_action('wp_head','insert_custom_css');最後に、保存したカスタムCSSのコードをそのページのwp_head()が呼ばれるタイミングで挿入します。
カスタムCSSを挿入する関数insert_custom_cssを作成し、add_actionで挿入する場所を指定しています。
カスタムJavaScriptを自作する方法
カスタムCSS同様、はじめに完成したコードをまとめて書いておきます。コピペしてfunctions.phpに貼り付ければそのまま使えます。
以降、基本的にはカスタムCSSとやっていることは一緒なので、重複した解説が多々ありますがご了承ください。
// functions.phpに以下を記述

// カスタムJavaScriptを追加する投稿タイプを指定して追加
function custom_js_hooks() {
  // カスタムJavaScriptを「投稿」に追加
  add_meta_box('custom_js', 'Custom JS', 'custom_js_input', 'post', 'normal', 'high');
  // カスタムJavaScriptを「固定ページ」に追加
  add_meta_box('custom_js', 'Custom JS', 'custom_js_input', 'page', 'normal', 'high');
  // カスタムJavaScriptを「カスタム投稿タイプ "news"」に追加
  add_meta_box('custom_js', 'Custom JS', 'custom_js_input', 'news', 'normal', 'high');
}

add_action('admin_menu', 'custom_js_hooks');


// 各投稿編集画面にカスタムJavaScriptの入力欄を作成
function custom_js_input() {
  global $post;
  echo '<textarea name="custom_js" rows="5" cols="30" style="width:100%;">'.get_post_meta($post->ID, 'custom_js', true).'</textarea>';
}

// 作成した入力欄に記述があれば、それを保存
function save_custom_js($post_id) {
  if(!empty($_POST['custom_js'])) {
    update_post_meta($post_id, 'custom_js', $_POST['custom_js']);
  } else {
    delete_post_meta($post_id, 'custom_js');
  }
}

add_action('save_post', 'save_custom_js');


// 保存したカスタムJavaScriptの記述を、そのページのwp_footer()が呼ばれるタイミングで挿入
function insert_custom_js() {
  if(is_page() || is_single()) {
    if(have_posts()): while(have_posts()): the_post();
    echo '<script type="text/javascript">'.get_post_meta(get_the_ID(), 'custom_js', true).'</script>';
    endwhile; endif;
    rewind_posts();
  }
}

add_action('wp_footer','insert_custom_js');
以下でコードの詳細を3パートに分けて解説します。
カスタムJavaScript機能を追加
// カスタムJavaScriptを追加する投稿タイプを指定して追加
function custom_js_hooks() {
  // カスタムJavaScriptを「投稿」に追加
  add_meta_box('custom_js', 'Custom JS', 'custom_js_input', 'post', 'normal', 'high');
  // カスタムJavaScriptを「固定ページ」に追加
  add_meta_box('custom_js', 'Custom JS', 'custom_js_input', 'page', 'normal', 'high');
  // カスタムJavaScriptを「カスタム投稿タイプ "news"」に追加
  add_meta_box('custom_js', 'Custom JS', 'custom_js_input', 'news', 'normal', 'high');
}

add_action('admin_menu', 'custom_js_hooks');まずカスタムJavaScript機能を使えるよう、コードを記述してカスタムJavaScriptの入力欄を設置します。
関数custom_js_hooksの中に、投稿タイプごとにカスタムJavaScriptの入力欄を設置するコードを記載します。
コードの構成は以下の通りです。ラベルや投稿タイプはお好きなようにカスタマイズしてください。
add_meta_box('入力欄divタグのID', '入力欄の上に表示されるラベル', '入力欄を作成する関数', '投稿タイプ名', '編集画面での表示場所', '表示優先度');なお、入力欄を作成する関数 “custom_js_input”は、この後出てきます。
最後にadd_actionでこの関数を有効化します。
カスタムJavaScriptの入力欄を作成
// 各投稿編集画面にカスタムJavaScriptの入力欄を作成
function custom_js_input() {
  global $post;
  echo '<textarea name="custom_js" rows="5" cols="30" style="width:100%;">'.get_post_meta($post->ID, 'custom_js', true).'</textarea>';
}

// 作成した入力欄に記述があれば、それを保存
function save_custom_js($post_id) {
  if(!empty($_POST['custom_js'])) {
    update_post_meta($post_id, 'custom_js', $_POST['custom_js']);
  } else {
    delete_post_meta($post_id, 'custom_js');
  }
}

add_action('save_post', 'save_custom_js');前半部分では、関数custom_js_inputでカスタムJavaScriptの入力欄を作成します。ただのtextareaタグなので、行数などはお好みで調整してください。
後半部分では、作成した入力欄に記述されたコードを保存する関数save_custom_jsを作成しています。
そして先ほど同様、add_actionで投稿記事の編集が保存されたタイミングで、関数save_custom_jsが実行され、記述したカスタムJavaScriptのコードも保存されるようにします。
保存したカスタムJavaScriptを挿入
// 保存したカスタムJavaScriptの記述を、そのページのwp_footer()が呼ばれるタイミングで挿入
function insert_custom_js() {
  if(is_page() || is_single()) {
    if(have_posts()): while(have_posts()): the_post();
    echo '<script type="text/javascript">'.get_post_meta(get_the_ID(), 'custom_js', true).'</script>';
    endwhile; endif;
    rewind_posts();
  }
}

add_action('wp_footer','insert_custom_js');最後に、保存したカスタムJavaScriptのコードをそのページのwp_footer()が呼ばれるタイミングで挿入します。
カスタムJavaScriptを挿入する関数insert_custom_jsを作成し、add_actionで挿入する場所を指定します。
JavaScript場合はbodyタグの終わりの直前に記載する場合が多いので、add_action(‘wp_footer‘ 〜としていますが、headタグ内に記載したい場合は、カスタムCSS同様wp_headに書き換えればOKです。
おわりに
コードは結構長いですが、カスタムCSSもカスタムJavaScriptも基本的に行っている処理は同じです。
しかも、コピペでも動作するので、「無駄にプラグインを入れたくないけど楽をしたい」という人には非常におすすめです。
ちなみに、カスタムCSS、カスタムJavaScriptのプラグインとしては、Simple Custom CSS and JSが有名ですが、無料版ではページごとに独自のCSS、JavaScriptを挿入できないので、あまり汎用性は高くありません。(サイト全体に対するCSS、JavaScriptの挿入は可能です。)
汎用性の高いカスタムCSS、カスタムJavaScript機能をお求めの方、良かったらこの記事で紹介した方法をお試しください!